Internal jugular vein catheterization |
To perform catheterization of a central vein (here of a right internal jugular vein - IJV) using Seldinger technique you will need a catheterization set that consist of 18G needle, J-tipped guidewire, dilator and central venous catheter (CVC). We routinely use BBraun Medical catheterization sets, Certofix CVCs and Intradin introducers. In the following sequence you'll see different approaches to right IJV punction (you may also puncture left IJV, however, due to possible difficulties during catheter advancement into superior vena cava, as well as higher probability of pneumothorax and lymphatic duct injury, this approach is rarely used). When you're planning to catheterize an IJV in an awake patient you'll also need to perform local anesthesia first. When the landmarks are not prominent you may want to use exploring IM needle. In this example the landmarks are good and this technique was not used. Before the beginning you should rotate a patient's head to the side opposite to the punction's and extend his/her cervical spine a little. Beside this one should place the patient in Trendelenburg, to increase filling and diameter of IJV. After that the site of a punction is cleansed with an antiseptic solution, this is performed in sterile gloves and in sterile hospital gown (the latter is more desirable when you're performing several catheterizations or planning to insert a pulmonary artery catheter (PAC)). The gold rule for every catheterization - You must feel comfortable, everything should be at hand. Please do not forget to lift the table according to your growth, just for not to take bizarre postures causing burning backpain during the procedure.
|
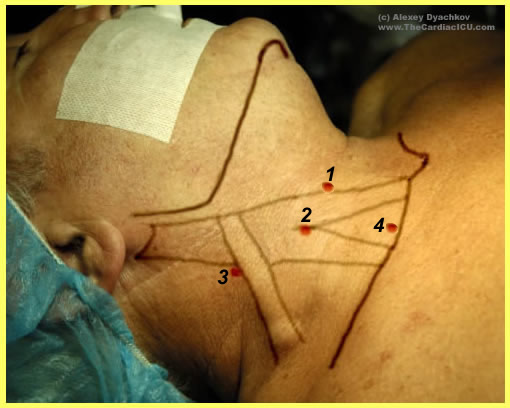

1. The main landmarks are shown - the sternocleidomastoid muscle (SCM), its sternal and clavicular heads, external jugular vein, the clavicle and jugular notch. Numbers are for several routinely used approaches: 1 - anterior; 2 - central; 3 - posterior; 4 - supraclavicular. Variations are possible, one may want to find a point between 2 and 4; some guidelines refer it to as a central inferior approach and so on (about 3 more puncture points can be found in guidelines). Note, if you feel distinct carotid pulsation and even are able to move the artery medially, you will not necessarily succeed with IJV puncture but surely will avoid that of carotid artery (ICA). Recall the course of the IJV relatively to ICA - in the upper neck behind the ICA, in the middle neck laterally and in the lower third - in front of ICA joining the ipsilateral subclavian vein. |
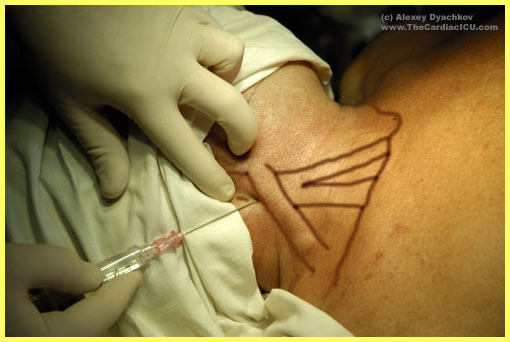
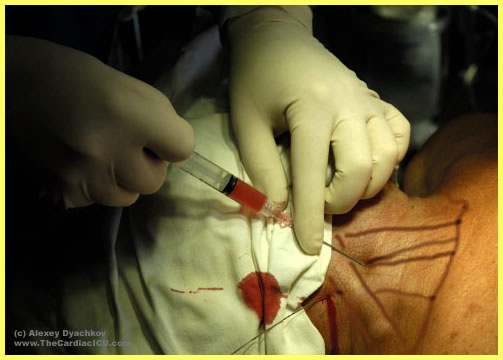
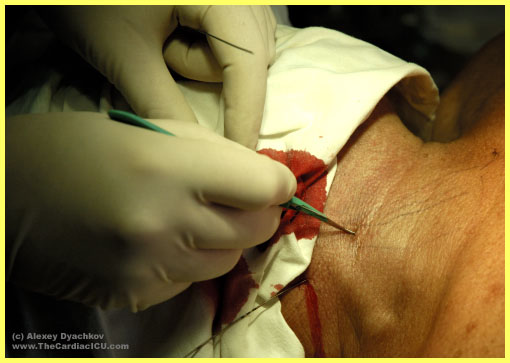
2. Posterior or lateral approach. Pucture site is at the crossing of external jugular vein and lateral border of SCM. If external jugular is not prominent you may relate to the upper border of thyroid cartilage. The needle under aspiration is advanced under the SCM pointing to jugular notch. The vein is usually found at the depth of 2-5 cm. If the vein is not encountered one may change the angle of the needle more cranially or caudally. The safety reasons require caution; try to control ICA position during repeated attempts, consider using a finder needle. |
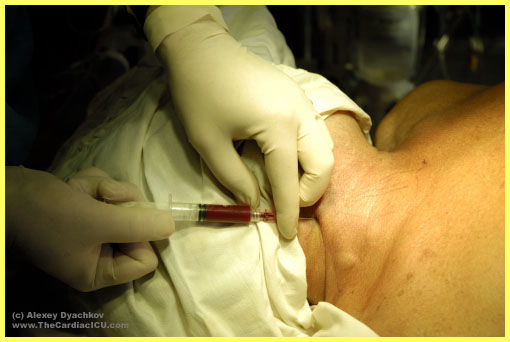
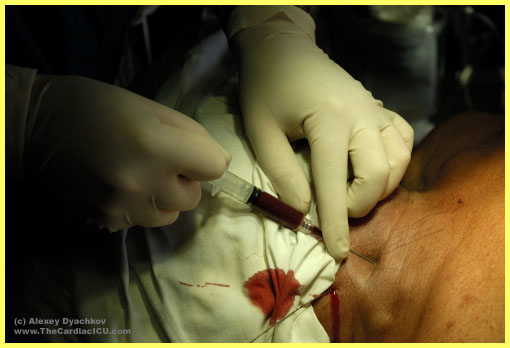
3. Here the needle was directed more caudally, however the needle is still advancing under the SCM. When you've got blood in your syringe check its colour (when the volume of solution in the syringe is relatively large or when you have local anesthetics in the syringe the blood may seem quite bright - in this case try to push it back assessing the resistance, you may suspect carotid puncture if it's quite high) |
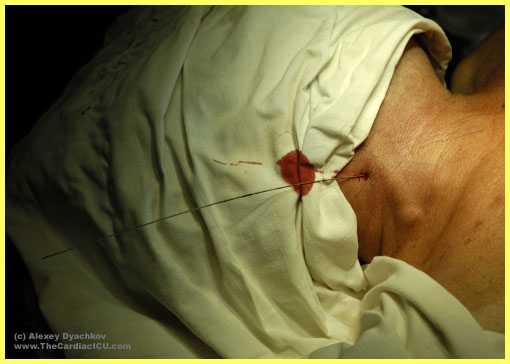
4. Gently detach the syringe. To avoid tremor while you're taking the J-guidewire, hold your hand with the needle against the patient. The guidewire should be in advance placed in the known position and within easy reach so that you don't have to bend trying to get it only to find that your needle has moved out of the vein. |
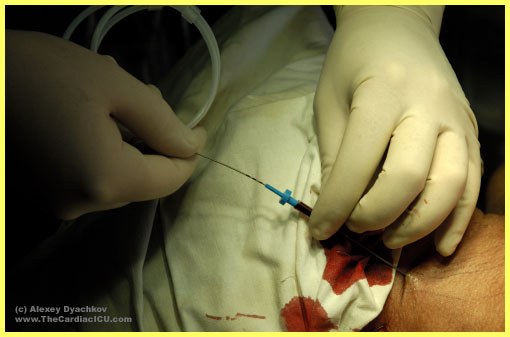
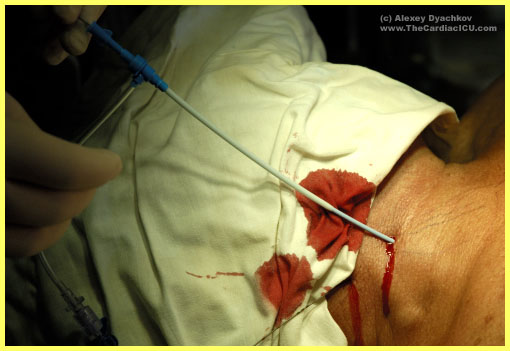
5. While advancing the guidewire you shouldn't feel much resistance, apart from gentle rubbing of corrugated guidewire against the needle edge. If you feel some noticeable resistance, don't withdraw the guidewire, first try to rotate it and if it was set against the vein's wall it may slip further. If you decide to withdraw it through the needle the best scenario would be the guidewire got shaggy, the worst - it's cut off and you have problems far more serious than the need for repeat puncture when you withdraw the guidewire with the needle. If, during the repeat try you are in the same situation, try to insert the guidewire with its straight end. In case of failure change your approach. After successful insertion of the guidewire (no further than 20 cm to avoid arrhytmias), withdraw the needle, holding the guidewire in place. |
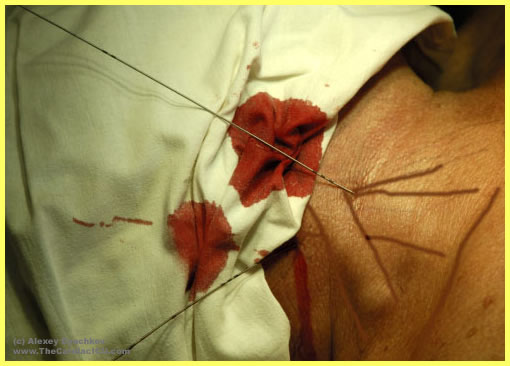
6. Double IJV pucture is shown since we routinely place an introducer and a 2-lumen CVC almost for every surgery requiring CPB. IJV is used since it is easily accessible, adequate hemostasis can be performed in case of inadvertent ICA puncture, and due to several other reasons. Subclavian vein from the subclavian approach is very rarely used, since the catheter is often squeezed between the clavicle and the first rib after sternal retraction. Because 2 catheters are going to be placed, we place 2 quidewires first to avoid cutting off the catheter already placed while puncturing the vein in attempt to advance the guidewire for the other catheter. |
7. Here we have the classic point for central approach, namely the angle between the SCM heads. The needle is advanced at the angle of 30-40 degrees towards the ipsilateral nipple. The vein has not been found - change your direction a little medially or laterally. Remember, the vein is usually located at 1-3 cm depth, in some slender persons it could be found just under the skin. |
8. Gently remove the syringe while holding the needle in place. Insert the gudewire no further than 20 cm following instructions above. |
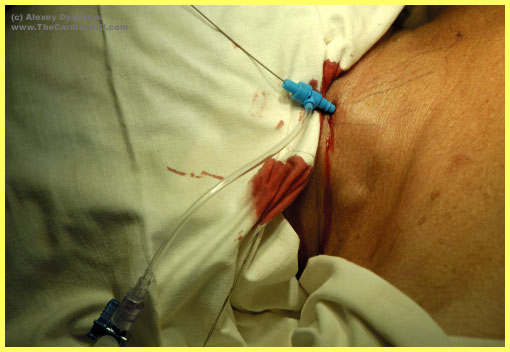
9. Hold the quidewire, remove the needle. Now you see a pretty nice picture - 2 strings coming out of the patient's neck. You may proceed with CVC and introducer placement. |
10. First place the dilator into the introducer. If a side lumen is integrated into the introducer it would be wise to place a 3-way stopcock on it to avoid hemorrhage from this side line after removal of the dilator. These preparations are made on the sterile table. Than you use a scalpel dissecting the skin and subcutaneous fat at the site of the puncture.The depth of dissection depends on the depth of the vein - you surely don't want to dissect the vein. |
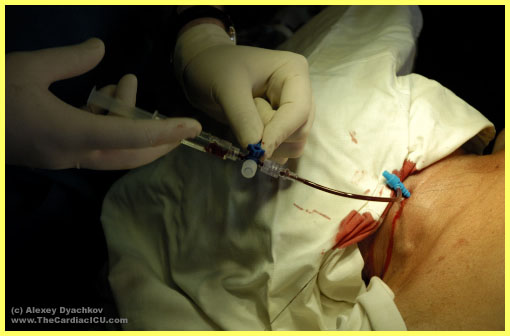
11. Introducer-dilator are advanced over the guidewire. Try to hold them by you fingers near to the skin to avoid bending and additional tissue injury. You don't need to insert the stiff dilator with the introducer till it's end, when the introducer's end is in the vein it will easily slip further without the dilator, you, in turn, will avoid laceration the vein removing the latter. Remember, you should simultaneously withdraw the guidewire and the dilator, after that the introducer hemostatic valve comes into work. |
12. A guidewire and introducer' removal. |
13. The introducer's position is confirmed by aspiration of venous blood. Introducer is flushed with sterile saline and fixed to the skin by ligature. We recommend making one loop around the introduser itself and the other loop around the side lumen for better fixation. The second guidewire is used for 2-lumen CVC, to see its placement please refer to other illustrated manuals. |