Radial artery catheterization, Seldinger technique |
|

1. Before proceeding with the catheterization, many guidelines recommend performing Allen test to evaluate collateral perfusion of the hand. The value of this test is doubtful, you may even find some anectodal reports describing hand ischemia after normal Allen test. We do not use it and never saw any complications. |
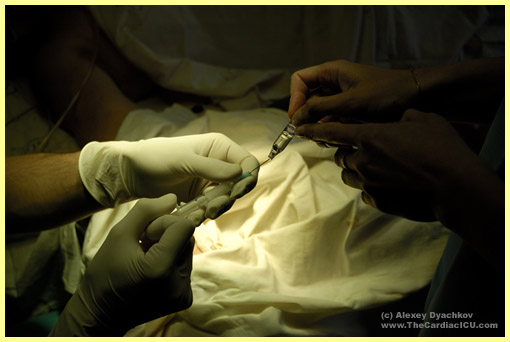
2. For local anesthesai we routinely use 2 ml syringe and 2% lidocaine (please note, graceful hands of operator and assistant are already half of success) |
3. The artery is palpated 2-3 cm along its course, at the presumptive site of punction, it helps with choosing a right direction for the needle since the direction of the artery is quite variable. Then, a small skin wheal is made. |
4. Tiny volume of lidocaine (to avoid moving the artery and lose pulsation) is injected paraarterially for spasm prophylaxis. When the pulsation is subtle, the deep infiltration may be omitted. |
5. After local anesthesia, arterial pulsation may move and a point for arterial puncture may become different from the point for the local anesthesia. We recommend palpating the artery again before making the final decision. |
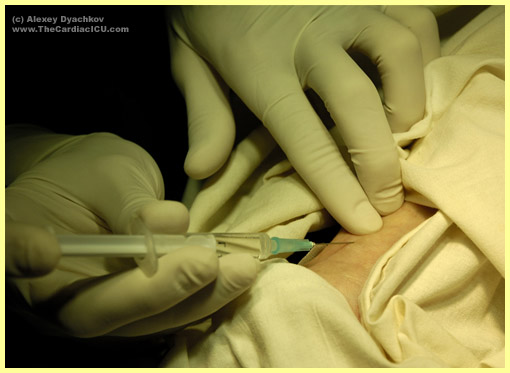
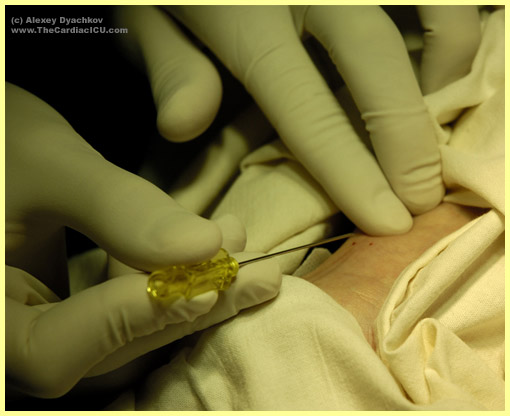
6. A 20G needle is inserted at an angle of 30 degrees and advanced toward the pulsation in rapid short 1 mm increments, which increases probablity of getting into the arterial lumen. Constant slow movement of the needle may result in transfixing the artery (e.g. the artery is punctured through the both walls) which decreases likelihood of success. If after you've inserted the needle deep enough you still don't see any flashback, you may think of double puncture. In this case we recommend lowering the angle of needle's slope and slow its withdrawing in small tractions (since you may get into the lumen on your way back). |
7. After you hit the artery you see a pulsating trickle of blood coming from the needle. When the pusation is weak or absent, note the colour of coming blood since you may have punctured a vein. After you see a flashback we recommend decreasind the angle of needle slope down to 5-10 degrees and move it 0.5 - 1 mm forward, the needle will surely be in the lumen. |
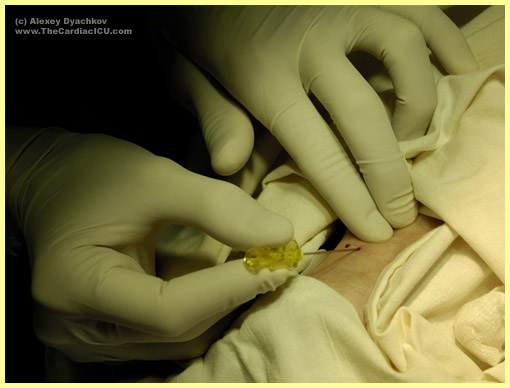
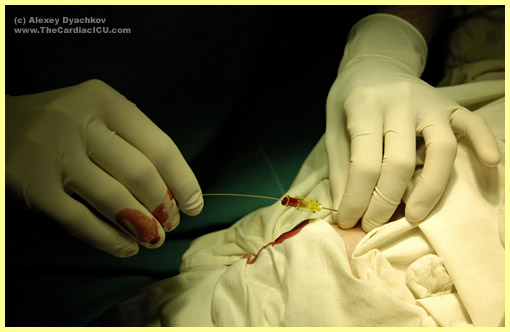
8. The needle is intercepted by the left hand. Try to lean your intercepting hand against the forearm of the patient - this maneur will decrease finger tremor, and the needle will stay in the lumen. |
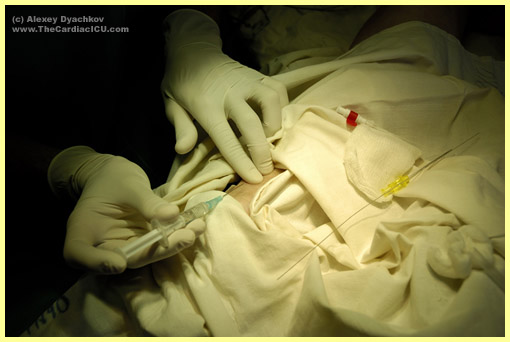
9. After that, when the pusation is prominent, you place a guidewire into the needle and move it down into the artery. The guidewire should be nearby, so that you may take and insert it by one rapid motion. |
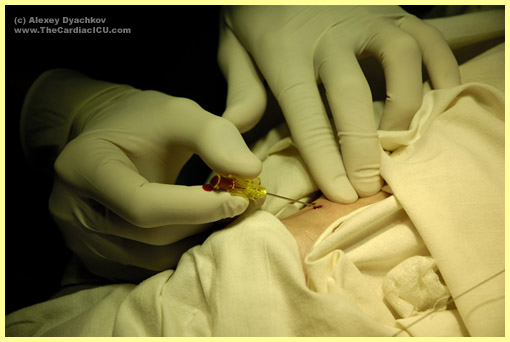
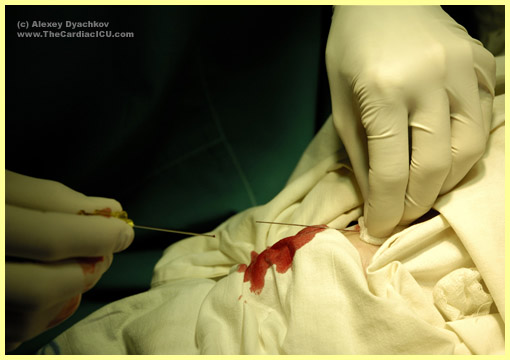
10. The needle is removed. After that the puncture site should be pressurised by your finger, since some patients with elevated blood pressure may develop a hematoma while you'll be inserting the catheter over the guidewire. |
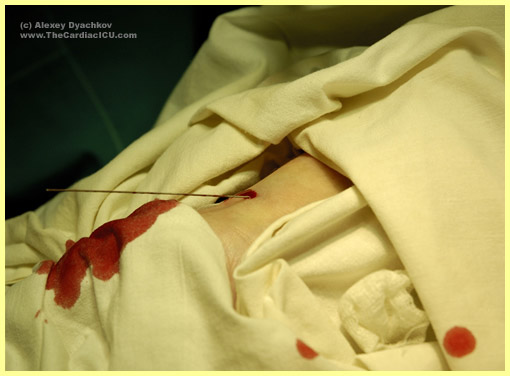
11. The guidewire is in the artery. The pressure is removed for educational purposes. |
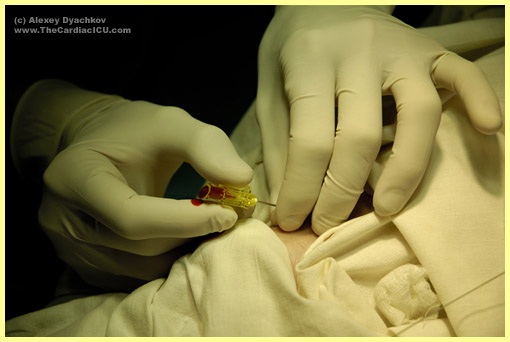
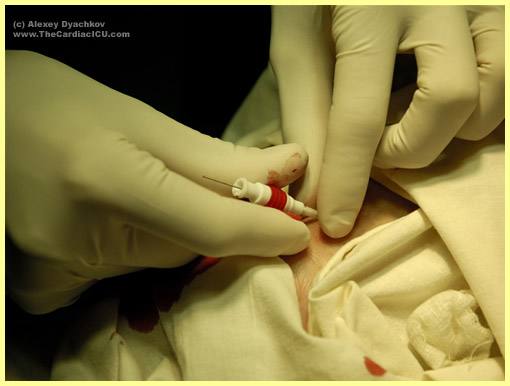
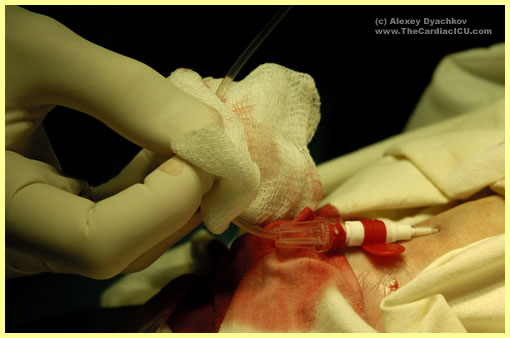
12. Radial arterial catheter BBraun Arteriofix 20 G is inserted over the guidewire into the artery. The guidewire is removed. |
13. An arterial (invasive blood pressure monitoring) line is connected to the catheter. The arterial blood aspiration is checked, and air bubles that may have gotten into the line during connecting are removed. After flush, an arterial curve appears on the display.. |
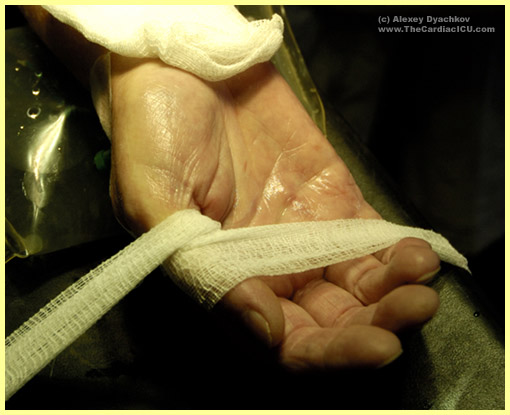
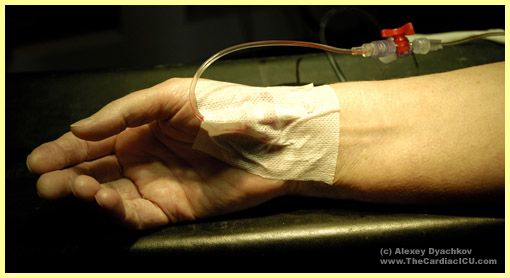
14. The line and skin are cleansed dry, The line and catheter are fixated by adhesive tape. |
15. The procedure is over. |